Whenever we have people over at our house for dinner, I make it a mission to cook grilled pizza. The dough recipe makes enough to feed eight, so it's not something I can make all the time (shoosh with your "just half the recipe" business--math and pizza don't mix). It's a great recipe for guests anyway, because you can make the crust and prepare the toppings in advance, and then it's up to the guests to do the actual grilling, freeing you up to enjoy having people over (or to chase a Toddler if you're cool like me). They get to pick their own toppings, so there's no worrying about trying to keep everybody happy. Really, it's genius.
Alexis' Grandma requested the recipe, and I figured that it would be easier to throw it into a blog post than to write it by hand. See how nice I am? I even share with you.
Grilled Pizza Crust
(adapted from Fine Cooking September 2004 issue) (Um, how the heck do I have an issue that old?)
1 package active dry yeast
1 1/4 cups warm water
4 1/4 cups flour
2 teaspoons salt
1/4 cup olive olive
Stir the yeast into the water and allow it to sit for 15 minutes. Combine the flour and salt in a large bowl. While mixing using low speed on a mixer with a dough hook, slowly add the yeast mixture and the olive oil alternately to the flour. Knead until well combined (using the mixer or on a floured surface by hand), until the dough becomes elastic. The dough should feel soft and be a little bit sticky. If it feels grainy or dry, add more warm water 1 tablespoon at a time.
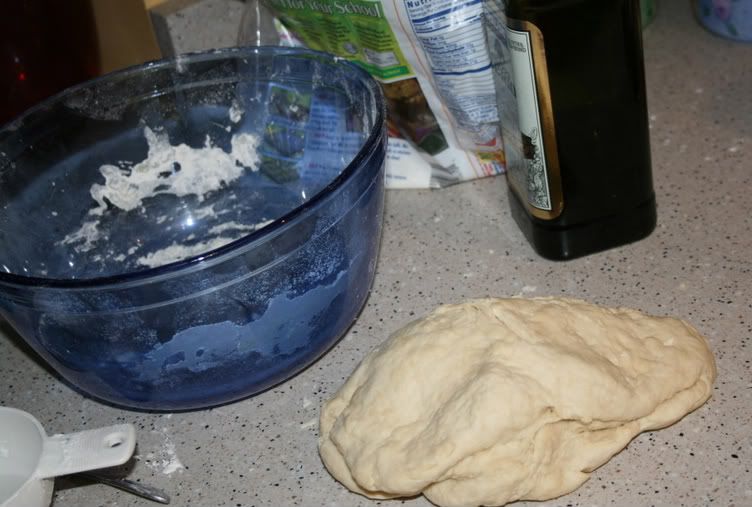
Place the well-kneaded dough into a bowl which is lightly oiled and cover with a damp dishtowel. Allow the dough to rise until it is doubled in size, approximately one hour. The dough is done rising when you poke it and the dough holds the finger poking impression (fancy wording right there, don't you think?).
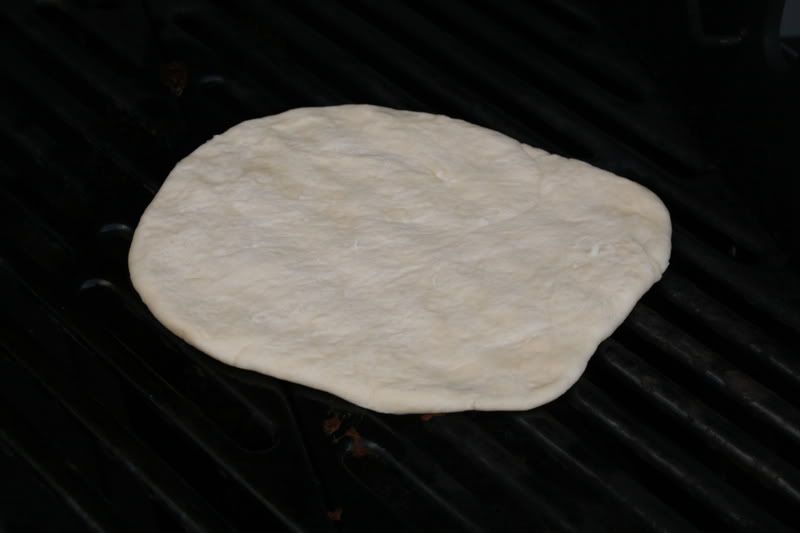
Once the dough is done rising, punch it down and divide it into 8 evenly-sized balls. Roll out each ball using a rolling pin until each circle is approximately 1/4 inch thick (thicker if you prefer thick crust, thinner if you have excellent taste and like crispy crust). You can stack the crusts on a plate by placing a sheet of wax paper in between each one.
And, you have crust. You can do the dough in advance. For example, if you want to make it one day in advance, do all the combining and mixing and kneading, then wrap the dough up and put it in the fridge. It will slowly rise overnight and you can roll it out the next day.
Here's the cooking instructions:
Heat the grill to medium. Using a pastry brush, brush olive oil on one side of a crust and place the crust oil-side down on the grill. Close the grill lid and wait a few minutes. The first side of the crust is done when it is lightly browned (we like it to get dark brown stripes, but don't like any black burnt crust up in the joint).
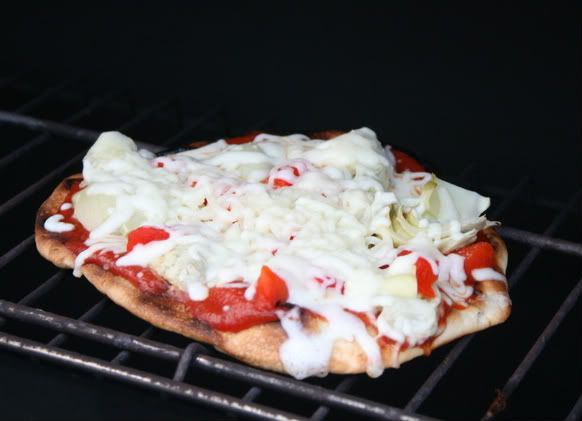
Brush oil on the uncooked side of the crust and flip it using tongs or a spatula. While the second side of the crust is cooking, throw on some toppings. We like to start with standard red pizza sauce and mozzarella cheese, but we do tend to get fancy with the artichoke hearts, roasted red peppers, spinach, Feta cheese, sundried tomatoes, red onions, and whatever else floats our boats that day. If the bottom crust looks like it is completely cooked before the cheese melts, move the pizza to the top rack in the grill.

We usually don't cook more than one or two at a time so that there is space for people to work their magic with their own toppings.
A finished pizza which proves I am not a good food photographer AT ALL: