There are many projects that get started and ... pretty much just get started. Look, it's not that I'm not a finisher; it's that life gets in the way. I start things, I try to keep working on them, but then I get distracted by something else that is more important at the moment.
Not so with the stained glass mosaics.
I have started and finished four of them so far. Part of that is because they're easy. Part of it is because I can recruit the 8-year old to help. Most of it is that they are best accomplished in phases, so it's easy to commit myself to 10 minutes here and there and continuously make progress.
And then there is the fact that I just plain love them.
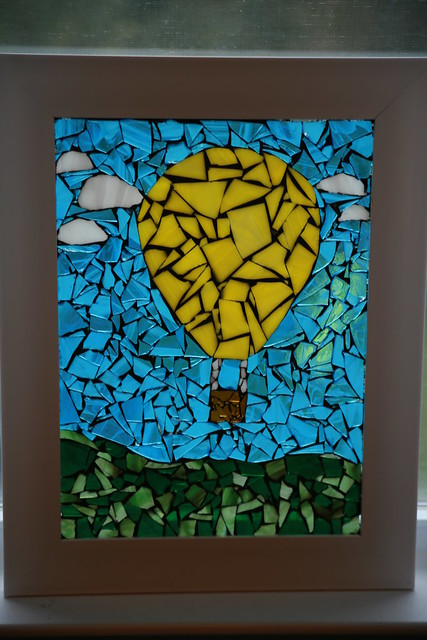
I can't show you all of them that I have finished since some are going to be gifts, but the hot air balloon above? I love it. A lot. It was the easiest of all of the ones that I have finished so far.
I started a new one today, so I figured it was as good a time as any to share the instructions. The hardest part of this whole thing is finding the glass, by the way. Seriously. They are SO easy to make.
You will need:
A frame
Clear school glue
Glass
Grout
That's it.
So, let's get started.
1. The first thing you need to do is to prepare your frame. You need to make sure you have the right kind if you want to keep things simple. Look for one that has little metal tabs on the back.

Other types will work, but they require some rigging. Keep it simple and seek out the tabs.
2. Take out the backing, mat, and any other paper. All you need is the frame and the glass. Once everything is out, push the little metal tabs against the glass until it's secure.
3. Draw the image you plan to create on a blank piece of paper, or find a coloring book page, photo, or whatever. The key is to use an image that isn't too terribly detailed. The less small/tiny things you have and the less detail you have, the easier it is to make something fancy.
Alexis asked to make a Halloween one, so I told her to draw a ghost for me.
4. Place your drawing behind your glass and frame exactly where you want to end up with the image.

5. Break some glass. Before we look at that, though, the finding of the glass really is the hard part. If you're local to Pittsburgh, the only place I've found it is Hobby Lobby. If anybody knows of anywhere else worth checking, holler. We've broken up with Hobby Lobby around these parts.
Fortunately, Amazon is also a good source. Here are some options:
Already broken pieces, but you have to not mind that you get whatever colors you get.
Also already broken pieces, but more color control. Also, these are "smoothed" on the edges, so they're good for letting kids get involved. Check the related items for other color choices.
Small sheets at a great price, but again you don't get to pick your colors.
If you want to control color, you're looking for things like this.
Or this.
If you're not an Amazon person, that's cool. There are other options:
I found some absolutely gorgeous glass at this store.
This is another, less expensive option.
This ebay store is yet another inexpensive source. I've ordered from there and been happy so far.
Now that you've found your glass, let's break it. The least scary way to do that is to grab an old kitchen towel and set a bit of glass on it.

Fold the towel over top of the glass.

And use a hammer to smash it. Seriously. Just whack at it. This is not a perfect science so don't try to turn it into one.

One whack is not usually enough to make small enough pieces, so you may have to smash things for a bit. Just make sure to keep covering the glass up because it will fly all over the place if you don't. Safety glass are probably a good idea, even with the towel.

There is no right size for the end result. It depends on what you like, what you're making, and all of that. I prefer smaller pieces, but it really doesn't matter. Do what makes you happy.
6. Now that your glass is ready, it's time to start gluing. I wasn't kidding when I said you just need clear school glue.

It's up to you if you want to lay out all of your glass and then glue it in place or you just want to play Tetris while your glue is wet. Whatever works for you is fine. Personally, I do a little of both.
I do always outline the main thing first. For example, I'm starting the ghost by outlining it. Then I will fill in the body, then the eyes, then the word "boo," and finally I will fill in the background.

When you're gluing down pieces, look for gaps. You can fill them with tiny little pieces of glass. Also, if you find that you can't seem to get the right shape for a particular spot, a pair of glass nippers can come in very handy. I used a pair to shape my clouds for the hot air balloon mosaic at the top of this post.

If something isn't working, just rip it off. A little soap and water will loosen/remove the glue.
Remember, though, this isn't a perfect science. It's totally OK if things aren't "perfect."
7. Once all of your glass is glued in place (For the record, that project can be spread over many days. Just pour the glue as you need it so you can walk away whenever.), it's time to wait. You need to wait at least 24 hours before you grout.
8. Grout!

I found that small container of grout at Michael's, but you can also find it online. There are tons of different colors available.
Mix the grout according to the directions. I have only done smaller projects (the largest is 11" x 14"), so I mix one tablespoon of grout with the appropriate amount of water in a disposable cup. That has been PLENTY every time.
When you're grouting, you're shoving grout into all of the nooks and crannies. Be careful not to cut up your fingers on any sharp edges. (I wouldn't let a kid do this part. I personally have drawn blood even when careful.)

It will take a bit, but just keep shoving grout into cracks.

Then wipe the excess grout off with a damp sponge. This part requires a little patience. You may have to rinse your sponge several times and go over it again and again and again. I like to use a dry paper towel after every 5-6 wipes just to keep things cleaner.
9. Let it dry. It takes about 24 hours to fully set, but once it does, you're done!
Seriously, that's all there is to it. It's so easy an 8 year-old can do it.
Now go forth and mosaic, y'all. And please show me what you create because I need some more ideas for gifts.